Sep 16, 2011

The Ghost Dog in the Kitchen - part 2, installation

The ghost dog mosaic (see previous post for details on it's construction) was installed in the kitchen earlier this summer.  The entire mosaic was cut into sections about 8" long for transport to NM.  The bondbeam was spritzed with water, covered with thinset and the sections of mosaic installed one at a time.  I'm always nervous about fitting everything correctly because I construct the mosaics 1200 miles away and can't check as I go along.  In this case, the fit was dead-on; whew!  The mosaic was then grouted with a sanded, reddish grout to match the wall.

In the photo here you can see the final mosaic.  I had to use a flash to take the photo (the kitchen is a very dark room) so the mosaic is actually more visible than it is in reality; the colors of the wall and woodwork are also washed out.  The final result is quite subtle (the colors match the wall well), the tiny mirror stars twinkle as you walk through the room and the ghost dog (good ole' Darwin) looks great.  It will look even better after the burnt adobe wall is scrubbed and sealed, a process that will reveal more of the natural colors in the wall (now covered with lots of dust and bits of concrete).

The next project for this wall will be a shallow shelf unit to hold canning jars of non-perishables (pastas, beans, cereals, etc.).  Perhaps I'll have enough of my Mom's aged wood to make the shelves.  We'll see!
Sep 1, 2011

Pretty Little Windows..... maybe

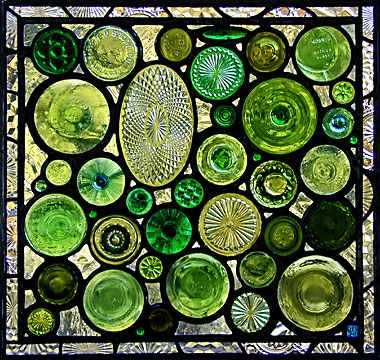
See the website of artist Daniel Maher for info about his work.
Paul and I have been fascinated for years by cutting up old bottles.  It seems everyone has a method, and those methods work... for those people.  We have never been able to succesfully cut bottles.  Oh, we can cut them up and have lots of jagged edges and cracks, but nothing you would be able to safely use.  Recently, I've seen a few examples of people making stained glass out of recycled wine bottles and glassware and I wanted to give it a try for a small window in the cabin.  I ran across a new method (for me) of cutting bottles and, after watching a few YouTube videos, was determined to give it a try.  Of course, it didn't work (lots of jagged edges!).  But Paul was determined.... and he found a way.

The premise is based on a cutting around the bottle with a glass cutter.  Here, the bottle is rolling on some old wheels we found, bottom against a straight edge, and the cutter is mounted upside down on the piece of wood (attached to the table with a hinge).  Note the mini propane torch and container of icewater.  Don't forget the gloves and safetly glasses!

First, while holding the bottle firmly against the straight edge, turn it while pressing down with the cutter.


Second, quickly turn the bottle while heating with a little propane torch (the kind everyone has for their creme brules).  The key here is turing quickly and having the tip of the flame only on the cut.  You may see videos with candles instead - we never got that to work, never.


Immediately, plunge the bottle into ice water.  You may hear a crack and have the bottom fall off; more likely you will have to remove the bottle and tap gently to separate the two pieces.


And there it is... the bottom of a bottle cut cleanly and evenly.  Very nice!  The next step is making the stained glass window - that's a post for another day.


The first apparatus was cobbled together with items from the shed and after some trial and error with the process, we made a few adjustments.  We replaced old wheels with some casters that didn't wobble- important in keeping the bottle straight.  We also aligned both the bottom of the bottle and cutter to the straight edge. 


If you give this a try yourself, the important thing is to have a single clean cut around the bottle.  If the begining and ending of the cut don't meet perfectly, you will have a jagged edge.  The bottle and cutter must be kept aligned during the cutting. Of course, you can buy a device that does all this for you, but why?  Once you figure out how to do this (and it does take a bit of practice), you will have success 95% of the time.  I'm leery of using this process to make drinking glasses, but for stained glass, I think it works fine.  The edges are quite sharp and still must be filed.  

Stay tuned for future posts on the window making.


Aug 12, 2011

Garden Update July 2011

This year has been an incredibly dry one.  Right now, the monsoon rains have begun and things are not as bad as they were during the spring and early summer (recall the AZ fires not too far away).  When I arrived at the cabin a few weeks ago, I was pretty depressed to see how dry things were. The upside is that there are no weeds - none - zip.  The downside is that trees in the orchard were suffering mightily.  Only the lavender (see @ left) was doing well.  I have an automatic irrigation system set up, but when your well runs dry, it doesn't do much for you.  Yes, indeed, the well has gone dry.  Not a surprise really.  The well is about 40 years old and one of last shallow ones left in the valley (currently the pump is @ 35 feet).  My neighbors are super nice and are letting me run a hose to their pump to keep my trees alive until I get a new well drilled.  As it is, I lost seven trees - a tough blow.  Being a biologist I can rationalize the loss in terms of natural selection - only the truly desert adapted will survive.  Thank goodness I planted so many varieties.

Dead pear tree.
I estimate the garden and orchard were without water for 3 weeks of 100 degree weather (and yes, that's quite normal for the Gila, not a heat wave).  It's interesting to see how some of the trees are perfectly happy and some died a tragic death.  The truly sad thing is seeing the shriveled fruits on the branches.  Sigh.
Happy pear tree.

The vegetable garden is a total bust.  No beans and chile this year!  As every gardener knows, each year brings different hardships and I'll have to start over once again.  On the bright side, when I left, the indigo seedlings were doing ok.  If the rains have been steady I might have some indigo plants to harvest.  We'll see...

Jul 30, 2011

A new life for old wood

The sunroom, see previous posts, was originally designed to be a greenhouse attached to the cabin. Three walls are mud-plastered adobe; the south "wall" is mostly window.  This frame wall is now covered with Tyvek and ready for stucco  and I was going to cover that with stucco.  I decided the stucco would never look right next to the adobe and brick, so I then I thought I would do mud plaster there too.  Then I saw a reclaimed wood wall online (not this one, but similar) and the lightbulb went off.  Thinking about the stuff around the yard at the cabin, I thought I could scrape up some wood, but most of it turned out to be 2x and 3x material, too thick (I'll use it for bookshelves).
No, my mom is not a hobbit.
I scrounged at my Dad's, but he had surprisingly little.  My last stop was my Mom's place.  She also had very little around the house, which was a surprise because she hoards everything.  While parking, I noticed some old pallets by the old horse pens. We waded through the enormous weeds to take a look....

The old goat pens.
My mom said I could have the pallets, but when I went to take a closer look, they were actually half buried in goat manure - not acceptable. Further investigation however, revealed a treasure trove of boards along the goat pens totally hidden by the weeds.  The boards were 1x10s, either four or eight feet long - perfect.  Each is an elegant silvery color and all are in very good shape.
A small sample of the harvested boards.
There is a lot of wood here, so even if I bang-up or rip some of the boards, there are plenty to spare.  The big adventure will be tramping through the weeds, fighting the spiders, and prying each board off the fenceposts.  The rewards will be great.  There's enough wood here to completely cover the sunroom walls, make some shelves in the kitchen and have lots left over for future projects.  Stay tuned