
A few weeks ago, Paul and I spent some time installing the aged wood (a.k.a. my Moms's old goat pen) in the sunroon (
see previous post). I thought it would be a quick process (measure, cut, apply), but Paul is much more a perfectionist than I am. I repeatedly tried to convince him that everything in the cabin is rough and/or crooked, so level, straight, and beveled were not necessary. I won part of the argument and he won another part. In the end, it took the better part of two days to do the window casings & sills and about 2/3 of the walls.

We put in a narrow shelf up high for some art work. The pieces selected for the shelf and window wills were all boards that had been extensively chewed by one of my mother's favorite horses. It's tricky to see in the photo above, but the sills have wonderful rounded, organic quality, each is different and there are more than a few tooth marks. It was a unique way to incorporate a bit of family history into the project.

Paul was pretty adamant about beveling the edges around the door, and although it took a bit of thought to figure out the correct way to cut each board (many incorrect cuts were made!), the extra effort was worth it. The door looks elegant and rustic at the same time.

The boards were all 1" thick (back in the days when a 1x12 was actually 1x12!), and although beautifully aged and silvery on the exterior, there was no decay on the interior. The wood was purchased 17 years ago (the building of the goat pen coincided with the birth of a favorite horse), but when we cut into it, it smelled fresh and piney. I honestly don't know if you can get good wood like that anymore. Quite a few knots had fallen out, but this gave us the opportunity to hide bits of old regional topo maps behind the wood. We now have quite a few 'Easter eggs' hidden through the room highlighting local rivers, mountains, and towns. Some of the wood has beetle damage and large splits, but it was slapped onto the wall no questions asked. With a project like this, you never really know how it will end up, but I think it looks great and I can't argue with the cost (zero!).


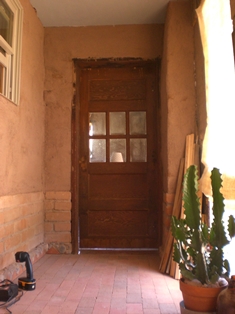 Paul and I wrestled the door back into place. It did have to be cut down a bit to make room for the mosaic in the doorway (see previous post). Otherwise, it seemed to fit, but those hinges were still a problem. I had bought a variety of door hinges in the hopes that something would work better (i.e. normally), but because of the way the doorway was constructed, there was no way to use any of them. Back to the ginormous old ones. An additional problem was that the adobe+plaster behind the doorway would crumble (and fall away) whenever normal wood screws were used. The screws were quite hefty to hold such a massive door and were about 3" long. Poor Paul had to use a hacksaw to cut 15 screws shorter.
 A few weeks ago, Paul and I spent some time installing the aged wood (a.k.a. my Moms's old goat pen) in the sunroon (see previous post). I thought it would be a quick process (measure, cut, apply), but Paul is much more a perfectionist than I am. I repeatedly tried to convince him that everything in the cabin is rough and/or crooked, so level, straight, and beveled were not necessary. I won part of the argument and he won another part. In the end, it took the better part of two days to do the window casings & sills and about 2/3 of the walls.


 As explained in Sundials: Their Theory and Construction, “A mirror placed horizontally in a southern window will reflect a beam of sunlight to the ceiling of the room. As the sun moves across the sky from east to west, the reflected sunbeam moves across the ceiling from west to east; and if hour lines are properly drawn upon the ceiling, the sunbeam can be used to tell the time of day or even day of the year.”
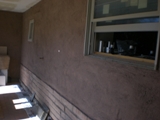 Because there is a low roof overhang preventing solar gain in the summer (to keep the house cool), this sundial will only work when the sun is lower in the sky, late fall through early spring. The sunroom is very narrow, so the sunbeam falls along the wall, not up on the ceiling. The plaster is a natural mud plaster, so I’m thinking I’ll calculate the meridian lines and place small stones in the mud to mark the hours. It will take some time to make the calculations and check their accuracy. We’ll have to watch, mark, and recheck for a year to be sure.


 As I've mentioned in previous posts, I gravitate to (but don't necessarily enjoy) projects that require 1) a lot of time and 2) little bits of things to be rearranged into something else. I'm also cheap (these days by necessity), so if I can make something out of little bits of nothing, I'm pretty happy. The adobe walls of the cabin are set on a concrete block stem wall which sticks out on the exterior and is indented on the interior. How to cover the unattractive concrete and spend little money? The original idea... rocks, stones & pebbles.
