A few years ago, I made a chandelier for the kitchen. The story is a typical one for me. Start with good (and cheap) intentions, then the project turns into so much more. The town in which I live has, what we fondly call, 'big trash day.' Twice a year, residents can put out just about anything on the curb and waste services will come and pick it up (we are not allowed to do this other times of year). An entire industry of scroungers trolls the neighborhoods looking for useable, fixable, or recyclable items. I've found some great things while walking the dogs. One day, I found a chandelier in a box. It had a nasty white/gold spatter paintjob, but the fixture was pretty. I painted the whole thing black to resemble wrought iron, attached some blue glass bead flowers and metal mesh, then took the fixture to the cabin.
My intention was to wire it into the ceiling and be done with it. Not so easy! The ceiling was wired for a fan/light combo and when I reached up to look at the wires, I got a nasty zap. The porchlight stopped working at that point also. (I'm not stupid, the electricity was off, something was seriously wrong.) Well, its been a year, and my father's friend, an electrician, came out to look at the problem. After four hours of back and forth with the wires (kitchen on, porch off, porch on, kitchen off, et cetera), the problem was finally resolved and the fixture installed.
Ahhhh, light in the kitchen at long last. The chandelier is not too fancy, but adds some class to the room. The beaded flowers sparkle and I know I'm going to be cleaning out cobwebs, but its worth it. After all the time and hassle, it would have been easier to buy a new one. However, I know for sure I have the only chandelier like this!
Showing posts with label The Kitchen. Show all posts
Aug 23, 2013
A Chandelier for the Kitchen
Apr 19, 2013
Making a Kitchen Cart
The cabin is small (if you've been following the blog, you know this), and counter space is at a premium. I have a rolling cart with a butcher block top in IL and use it constantly. One day, the idea to make a similar cart with a marble top popped into my head. The result is shown at left - pretty simple, but very useful.
The toughest part was painting all parts of the shutters. Note to all, spray paint is the way to go! I sprayed the primer, but brushed on the final coats of blue. It was time consuming and looks sloppy, but the shutters are down at knee level, so I'm fine with the result.
Mar 8, 2013
Wine Bottles to Windows Part 2
![]() |
| window in progress |
The goal for this project was to cover the 14" square
window in the living room and work on the tiny upper windows of the
kitchen. I've shown my process in a previous post; nothing too different here.
![]() |
| waiting to be installed |
I know, I know, the end results shown here are a bit messy,
but I'm happy with the result. I'm
especially pleased with the green windows.
They will be installed near the
ceiling and provide a bit of subtle light.
The main components of these windows are wine bottles (see the previous post on cutting). I wanted clear glass in the living room and
so had to drink a lot of not-so-great wine in clear bottles to get the glass I
wanted. One hint for beginners to
stained glass - don't start working with lots of circles. Fitting pieces to fill the spots between
rounds is a hassle (I hate cutting glass), and I usually end up using a huge amount of solder to fit the gaps. Be warned, this is not good technique.
One more window to go!
Stay tuned...
Aug 3, 2012
Sometimes a little grey is good
When facing the kitchen shelves with aged wood, I didn’t want to fuss with mitered joints. I didn’t think it was necessary. A small detail however, is that a lapped joint shows a bit of clean, non-aged wood right at eye level. What to do?
I remembered reading about aging wood using tea, vinegar, and rusty nails. Having all those items at hand in the cabin, I set to work. At the time I couldn’t remember the proper order of treatments, and I don’t know if it really matters. The basic concept (familiar to anyone who works with natural dyes) is mixing tannins with iron to create a black pigment. On wood, the color is grey and it really does match aged wood. The surface texture will differ, but for a tiny bit of wood, at an edge, this is a great technique.
In the photo above, you can see the effects of two applications on one half of an aged wood scrap; I used one application for my shelf. I also treated the top and bottom surfaces of the shelves (1/4" plywood). The surfaces are a smooth grey and match the color of the edge closely enough that the entire shelf seems like one very thick board.
I’ve found a recipe online similar to the one I recall from the past. If you try the technique, play around with the number of applications of each solution to get the intensity of grey you need. There is a strong vinegar smell while the wood is moist, but disappears when dried. The solutions are relatively safe, but even so, I wouldn’t leave them around kids or pets; they can be safely poured down the sink when you are finished.
I remembered reading about aging wood using tea, vinegar, and rusty nails. Having all those items at hand in the cabin, I set to work. At the time I couldn’t remember the proper order of treatments, and I don’t know if it really matters. The basic concept (familiar to anyone who works with natural dyes) is mixing tannins with iron to create a black pigment. On wood, the color is grey and it really does match aged wood. The surface texture will differ, but for a tiny bit of wood, at an edge, this is a great technique.
In the photo above, you can see the effects of two applications on one half of an aged wood scrap; I used one application for my shelf. I also treated the top and bottom surfaces of the shelves (1/4" plywood). The surfaces are a smooth grey and match the color of the edge closely enough that the entire shelf seems like one very thick board.
I’ve found a recipe online similar to the one I recall from the past. If you try the technique, play around with the number of applications of each solution to get the intensity of grey you need. There is a strong vinegar smell while the wood is moist, but disappears when dried. The solutions are relatively safe, but even so, I wouldn’t leave them around kids or pets; they can be safely poured down the sink when you are finished.
Jul 6, 2012
Adventures in Shelving
Work in the kitchen is almost complete. One of the last steps is installation of shelving. Because the room is so small and relatively dark, I decided against upper cabinets and chose to have a single row of shelves across the wall. I have to wait until the on-demand water heater is installed to put in the long shelf, but recently, Paul was able to work on the shorter shelf.
The first step was creating the hollow shelf. A frame was made from scrap 1x2's, screwed and glued securely (you can see some finger wipes in the photo). A skin of 1/4" plywood was glued on the top and bottom. I wasn’t concerned about perfect alignment (although Paul was) of the various parts because I wanted to face the edges of the shelf with a strip of aged wood (see previous posts about the sunroom). The aged wood would visually create a thick board, match the vigas, other finishes in the cabin, and just add to that casual, ‘rusticity’ that you see in old adobe homes.


Most torsion shelves are sanded and painted before the final install. Visually the shelves appear to float and have a very modern look. We installed cast iron brackets before adding the aged wood to the sides. A side benefit of the torsion shelf is that we didn’t have to worry about the brackets not being screwed into a stud. We did use expansion bolts (just in case) and the result is a very sturdy shelf.
All walls in the cabin are solid adobe, but the south wall (along which the plumbing runs) has drywall covering the bricks. This was the simplest way to deal with covering pipes and had the added benefit of creating a plumb surface along which the lower cabinets could run and providing an easier material into which shelves could be installed.
I don’t like the look of thick supports under shelves, but thought that something would be needed for support. These shelves will hold all the dishes, so there is potential for a heavy load. I bought some lovely cast iron brackets (see my Pinterest page for a link), but was still concerned that more support would be needed. Better to go overboard, than have all my bowls crash down.
After consulting various online sources, Paul and I designed a variation of a torsion shelf based on two websites, one from popular mechanics and the second from a blog.
A cleat was screwed into the studs on the wall. As with the frame, the cleat was scrap wood. It fits inside the torsion shelf and doesn’t show, so it doesn’t have to be attractive. It does have to fit snugly, so Paul spent some time sanding to get the shelf well seated on the cleat.
The shelf is then slid onto the cleat and securely screwed onto it. This photo shows the prefitting, before the aged wood was added to the edges. Interestingly, the adobe wall to the left is so out of plumb that when the shelf was level, it looked decidedly unlevel. We had to fiddle with it a bit to make it look good to the eye. Ahhh, the joys of working in an adobe home.
Most torsion shelves are sanded and painted before the final install. Visually the shelves appear to float and have a very modern look. We installed cast iron brackets before adding the aged wood to the sides. A side benefit of the torsion shelf is that we didn’t have to worry about the brackets not being screwed into a stud. We did use expansion bolts (just in case) and the result is a very sturdy shelf.
Oct 15, 2011
Thank goodness for big trash day!
( |
| Looking so much better! |
Last year, I found a great chandelier. Ok, it was pretty hideous, but I knew it had potential. The original paint was white with gold specks; as you can see in the photo above, the only ornamentation is the metal flowers on top. I thought if I spray painted it matte black and added a bit of color & sparkle, it would be a great addition to the kitchen.
After the paint job, the chandelier now looks just like wrought iron, which fits well with the style of the cabin. I rewired it for safety (always a good idea with old lamps) and tested for function (it works!).
I will wire the beaded flowers onto the front of the metal ones and add a few blue beads here and there for a trace of zing. Because I don't like light bulbs glaring out without shades, I've made some metal 'petals' to attach around the rim of each lamp.
A future post will show attachment of the petal shades and installation in the kitchen.
Sep 16, 2011
The Ghost Dog in the Kitchen - part 2, installation
The ghost dog mosaic (see previous post for details on it's construction) was installed in the kitchen earlier this summer. The entire mosaic was cut into sections about 8" long for transport to NM. The bondbeam was spritzed with water, covered with thinset and the sections of mosaic installed one at a time. I'm always nervous about fitting everything correctly because I construct the mosaics 1200 miles away and can't check as I go along. In this case, the fit was dead-on; whew! The mosaic was then grouted with a sanded, reddish grout to match the wall.
In the photo here you can see the final mosaic. I had to use a flash to take the photo (the kitchen is a very dark room) so the mosaic is actually more visible than it is in reality; the colors of the wall and woodwork are also washed out. The final result is quite subtle (the colors match the wall well), the tiny mirror stars twinkle as you walk through the room and the ghost dog (good ole' Darwin) looks great. It will look even better after the burnt adobe wall is scrubbed and sealed, a process that will reveal more of the natural colors in the wall (now covered with lots of dust and bits of concrete).
The next project for this wall will be a shallow shelf unit to hold canning jars of non-perishables (pastas, beans, cereals, etc.). Perhaps I'll have enough of my Mom's aged wood to make the shelves. We'll see!
Jul 1, 2011
The ghost dog in the kitchen
![]() |
| Excuse the mess, I'm working! |
An aside: eventually, I hope to make wine here and when that day comes, I'll need a label. In a previous post, I described the Ghost Dog, and I've been thinking about logos. I've come up with the design shown at left. The main body is ceramic tile with bits of mirror for stars and glass nuggets for leaves. The ghost dog will be cut from pale yellow glass.
The mosaic has made ahead of time in IL, using the same technique used on the mosaic on the kitchen floor (see previous post). The mosaic will be cut into manageable pieces, packed into a box, and taken to NM for installation.
Stay tuned for photos of the installation and end results.
By the way, big Yea! to Southwest Airlines for allowing me two free boxes of weird stuff each time I fly to Alb. I have slowly moved nearly an entire household box by box on SWA over the past two years and the airline staff have never been anything but super positive.
Dec 10, 2010
kitchen mosaic
![]() |
| The kitchen as seen from the living room. |
The room itself is small and quite narrow. You can see most of it in the photo above. To the right, behind the arch is another two feet of width, just enough for a small table and some chairs. The walls you can't see (behind the arch and to the right) are covered with a lovely lime plaster (my father's work). The wall to the left is painted (to match the plaster) drywall and the far wall is exposed burnt adobe.
The burnt adobe is nice and I decided to leave it exposed. The one thing I don't like about that wall is the ugly concrete bondbeam above the adobe. I plan to put up a shelf/opencabinet for dry goods stored in canning jars, but it will be small and the bondbeam will still show.
So, what to do to make it pretty? Since I have covered so many other sins in the cabin with tiles, why not this too? I have decided to do a mosaic, but it's going to be a subtle one. The room is dark and I don't I don't want to have so many things going on on the walls that the eye is frantically finding a place to rest.
At this point, I think I'll create a night scene (not sure what yet) and have some ghost dogs running. Darwin will be there for sure (see previous post) and maybe Simba, my sister's dog. Updates will follow! Stay tuned.
Sep 25, 2010
The Finishing Touch
![]() |
| Two completed drawer pulls |
So, a-searching on the internet I went. Either the attractive items were expensive, or they were mass marketed - which means everyone would have the same hardware in their new kitchen. I didn't want someone to look at the cabinets in 15 years and know they were installed in 2010. Also, I wanted something that looked natural & elegant, and had some meaning relative to the place itself.
After more searching, I went to Etsy and found an artist who makes lovely drawer pulls with vintage images decoupaged onto knob hardware. I examined carefully, read the descriptions, and thought I could give it a try - I already had many of the materials. I copied some beautiful line drawings of local plants onto ivory paper, tinted them with colored pencils, and proceeded to decoupage onto button covers and epoxy onto pulls.
In the end, each knob cost about $3, definitely a cost savings but it did take a lot of time to make the set. I used quick-set epoxy, which probably wasn't the best choice (frustrating to use), and the knobs aren't perfect (a small wrinkle here and there, some uneven placements), but they are beautiful. Each is different, but they look similar enough that you can tell it's a set. The color of the paper makes them look like scrimshaw on ivory and they work very well with the simplicity of the cabinets.
| The entire set of kitchen drawer pulls |
| close-up view |
Aug 10, 2010
The Kitchen
Although all rooms of the house were in similar shape when I took over the project, the living room seemed the most finished because the windows and floors were installed. The kitchen and bath were pretty depressing in comparison. The floors were still dirt - actually a very fine dust that magically moved and coated everything with the barest glance. The window frames had plywood nailed up and the rooms were very dark. The walls were bare adobe and seemed to be more eroded than those in the living room, an illusion created by the overall dingy atmosphere. The plumbing was roughed in, but that's it, no water to the house.
For the past 20 years or so, when staying at the house, most time was spent in the living room (with floors, a fireplace, and light!). However, most of our gear always ended up being stored in the kitchen "out of the way". The big downside was the ultra-fine dirt from the floor ended up everywhere. Another negative was the constant cold draft (in the colder months) from the unsealed windows and backdoor. I would hang a tarp in the archway, but still, it was a hassle. On top of all that, many of the local rodents thought the house was perfect for a winter (and sometimes summer) hideaway. My sister and I are convinced we are immune to hanta virus because of our years of exposure.
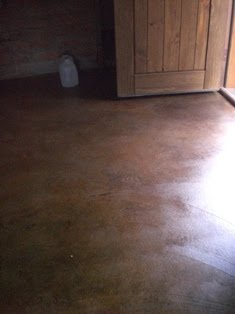
Last fall, my contractor Kenny, started work for finishing the kitchen and bath. Originally, the plan was to have a brick floor, but after researching options, I fell in love with stained concrete. Kenny said he'd never seen someone so happy about a concrete slab, but I pointed out to him that he probably hadn't worked with anyone who'd been waiting 20 years for that slab. The new floor made a huge difference staying and working in the house; the dust factor was reduced 95%. I stained and sealed the floor myself and am very happy with the results. The pictures don't do it justice.
Right after the slab went in, the wall with the window and plumbing was framed out and drywalled to cover the plumbing. The window to the sunroom was also installed. Immediately, the room took on a whole new look - so pretty!
![]() |
| The kitchen before construction. |
For the past 20 years or so, when staying at the house, most time was spent in the living room (with floors, a fireplace, and light!). However, most of our gear always ended up being stored in the kitchen "out of the way". The big downside was the ultra-fine dirt from the floor ended up everywhere. Another negative was the constant cold draft (in the colder months) from the unsealed windows and backdoor. I would hang a tarp in the archway, but still, it was a hassle. On top of all that, many of the local rodents thought the house was perfect for a winter (and sometimes summer) hideaway. My sister and I are convinced we are immune to hanta virus because of our years of exposure.
Last fall, my contractor Kenny, started work for finishing the kitchen and bath. Originally, the plan was to have a brick floor, but after researching options, I fell in love with stained concrete. Kenny said he'd never seen someone so happy about a concrete slab, but I pointed out to him that he probably hadn't worked with anyone who'd been waiting 20 years for that slab. The new floor made a huge difference staying and working in the house; the dust factor was reduced 95%. I stained and sealed the floor myself and am very happy with the results. The pictures don't do it justice.
![]() |
| My beautiful concrete floor |
Right after the slab went in, the wall with the window and plumbing was framed out and drywalled to cover the plumbing. The window to the sunroom was also installed. Immediately, the room took on a whole new look - so pretty!
| Before drywall |
| After drywall and plaster |
The plaster was completed on the north and east walls earlier this spring (compare this photo to the first). My father did the work himself using a traditional lime plaster. It's hard to see from photos how wonderful the walls look. The color is grey/white and the two walls have a real glow to them - like pearls. The finish is not quite smooth; during a certain part of the day, you can see all the facets on the wall giving a lot of depth to the finish. The lower portion of the east wall (shown above) and the entire west wall are burnt adobe; the bricks will be cleaned and left as is.
The cabinets are being installed so all the stuff that migrated from the kitchen into the living room, will now migrate back, but have new homes. No more boxes!
Subscribe to:
Posts (Atom)


(