Oct 29, 2011

A simple sundial for everyone

One of my goals for the cabin is to have an example of each of the major types of sundials somewhere on site.  During a recent trip, I experiemented with a layout for a reflected ceiling dial inside the house.   It didn’t work well in the living room because of the vigas (not a flat surface), but the sunroon looked promising.
As explained in Sundials: Their Theory and Construction, “A mirror placed horizontally in a southern window will reflect a beam of sunlight to the ceiling of the room.  As the sun moves across the sky from east to west, the reflected sunbeam moves across the ceiling from west to east; and if hour lines are properly drawn upon the ceiling, the sunbeam can be used to tell the time of day or even day of the year.”    
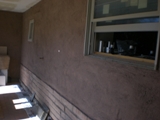
Because there is a low roof overhang preventing solar gain in the summer (to keep the house cool), this sundial will only work when the sun is lower in the sky, late fall through early spring.  The sunroom is very narrow, so the sunbeam falls along the wall, not up on the ceiling.  The plaster is a natural mud plaster, so I’m thinking I’ll calculate the meridian lines and place small stones in the mud to mark the hours.  It will take some time to make the calculations and check their accuracy.  We’ll have to watch, mark, and recheck for a year to be sure.

As you can see in the photos, the beam of light is quite bright, and during this visit, we actually had fun guessing the time by the placement of the light.  Lots of jokes about the time being “window thirty” or “half past the pipe”.

a tiny mirror makes the dial
If you want to try making your own dial, it isn't difficult.  You will have to polish your geometry skills, but the projects are straightforward. Sundials: Their Theory and Construction by Albert E. Waugh is my favorite book about making dials.  It's out of print, but still available through Amazon.  Try looking for it at your library.

Oct 15, 2011

Thank goodness for big trash day!

(
Looking so much better!
In our little town, we have what we call Big Trash Day.  Twice a year, residents place all their large items out on the curb for the garbage guys to pick up.  A substantial portion of the population cruises through the streets looking for treasures or items to recycle for money.  I can't begin to tell you how many wonderful items I've found (for instance a perfect, unused quilting frame).

Last year, I found a great chandelier.  Ok, it was pretty hideous, but I knew it had potential.  The original paint was white with gold specks; as you can see in the photo above, the only ornamentation is the metal flowers on top.  I thought if I spray painted it matte black and added a bit of color & sparkle, it would be a great addition to the kitchen. 

After the paint job, the chandelier now looks just like wrought iron, which fits well with the style of the cabin. I rewired it for safety (always a good idea with old lamps) and tested for function (it works!).

I will wire the beaded flowers onto the front of the metal ones and add a few blue beads here and there for a trace of zing.  Because I don't like light bulbs glaring out without shades, I've made some metal 'petals' to attach around the rim of each lamp.

A future post will show attachment of the petal shades and installation in the kitchen.

Sep 27, 2011

Meet the Locals: Summer 2011

aka Darkling Beetle
Tenebrionid Beetle
Ahhhh, the ubiquitous NM stink bug.... these guys are truly everywhere, and yes, I know they are not bugs.  Darkling Beetles (their real name) have a distinctive gait, tromping purposefully from place to place with legs akimbo. When disturbed, they do a headstand and puff out a blast of stinkiness - I'm one of the few who can't smell it, so I pick them up all the time. Even though they are small, they are strong!  It's difficult to hold them because they push back firmly and it's like holding a bundle of wire. 


Gibbifer californiatus
I know how Pleasing Fungus Beetles got their name; I'm always highly pleased when I find one trekking through the yard.  These are handsome beetles and, for such an obvious insect, they are quite common.  They are found throughout the southwest, but I've only every seen them in NM, lots here in the Gila and quite a few up north in the mountains around Santa Fe.  They emerge during summer and plink around looking for fungus to eat; there must be plenty of it because there are a lot of these beetles around.  The intensity of blue on the elytra varies from locale to locale, but all are strikingly visible from the natural tones of vegetation and soil. 


unidentified sphingidae
This is a sphinx moth caterpillar chomping away on one of the native nightshades in the yard.  If this individual resembles the nasty tomato hornworm you know and probably don't love, it's because it is a relative (the nightshade is related to your tomato as well).  When this caterpillar emerges as a moth, it will be large and probably very beautiful.  Hawkmoths, Hummingbird Moths, and Sphinx Moths are gorgeous and appreciated so much more than their younger selves. My favorites are the Hummingbird Moths which from a short distance are indistinguishable from the eponymous birds.


Agrius cingulata (?)
When harvesting aged wood from my mom's house, I found this Hawkmoth lounging on a fencepost.  It's difficult to tell from the photo, but there is a lot of pink on this individual - I think it is a Pink Spotted Hawkmoth.  These moths are in the same family as the caterpillar above.


Myrmelo sp.
New Mexico has been given two great gifts - dust in a mind-boggling array of varieties and a similarly stunning diversity of ants.  Antlions take advantage of these plentiful resources and can be found just about anywhere ants and dust are found.  The larva sits at the bottom of of the pit and flings sand up to catch an ant.  As the larva grows, so does the pit.  The adults are pale green, delicate and quite lovely.  They flutter around lights at night, vaguely resembling damselflies

Pogonomyrmex rugosus
Seed harvester ants are literally the queens of the desert. Colonies can live for decades and have a profound influence on everything around them.  This colony is new in the yard, and I'm happy to see it thriving, even though it in the middle of a path (why do they always do that?).  The property has been without a colony for a few years and I've been a bit sad about it.  The previous colony was well over 35 years (I remember playing with it as a little girl) and had multiple exits covering an acre or so. Even after five years, the gravel clearing is still there and will probably remain for a few more years.


Argemone sp.
The pricklepoppy has a lovely flower, but the rest of the plant is not as nice.  Lots of spines, toxic leaves, and when the plant dies and desiccates, it sticks to you like glue.  Still, the flowers are nice and the bees love them, so I let them bloom, then cut the whole thing down.  These flowers are seen everywhere in arid, mountainous areas, but not as much in full blown dessert.  One of the few flowers that will bloom in drought conditions.

Sep 16, 2011

The Ghost Dog in the Kitchen - part 2, installation

The ghost dog mosaic (see previous post for details on it's construction) was installed in the kitchen earlier this summer.  The entire mosaic was cut into sections about 8" long for transport to NM.  The bondbeam was spritzed with water, covered with thinset and the sections of mosaic installed one at a time.  I'm always nervous about fitting everything correctly because I construct the mosaics 1200 miles away and can't check as I go along.  In this case, the fit was dead-on; whew!  The mosaic was then grouted with a sanded, reddish grout to match the wall.

In the photo here you can see the final mosaic.  I had to use a flash to take the photo (the kitchen is a very dark room) so the mosaic is actually more visible than it is in reality; the colors of the wall and woodwork are also washed out.  The final result is quite subtle (the colors match the wall well), the tiny mirror stars twinkle as you walk through the room and the ghost dog (good ole' Darwin) looks great.  It will look even better after the burnt adobe wall is scrubbed and sealed, a process that will reveal more of the natural colors in the wall (now covered with lots of dust and bits of concrete).

The next project for this wall will be a shallow shelf unit to hold canning jars of non-perishables (pastas, beans, cereals, etc.).  Perhaps I'll have enough of my Mom's aged wood to make the shelves.  We'll see!