A few years ago, I made a chandelier for the kitchen. The story is a typical one for me. Start with good (and cheap) intentions, then the project turns into so much more. The town in which I live has, what we fondly call, 'big trash day.' Twice a year, residents can put out just about anything on the curb and waste services will come and pick it up (we are not allowed to do this other times of year). An entire industry of scroungers trolls the neighborhoods looking for useable, fixable, or recyclable items. I've found some great things while walking the dogs. One day, I found a chandelier in a box. It had a nasty white/gold spatter paintjob, but the fixture was pretty. I painted the whole thing black to resemble wrought iron, attached some blue glass bead flowers and metal mesh, then took the fixture to the cabin.
My intention was to wire it into the ceiling and be done with it. Not so easy! The ceiling was wired for a fan/light combo and when I reached up to look at the wires, I got a nasty zap. The porchlight stopped working at that point also. (I'm not stupid, the electricity was off, something was seriously wrong.) Well, its been a year, and my father's friend, an electrician, came out to look at the problem. After four hours of back and forth with the wires (kitchen on, porch off, porch on, kitchen off, et cetera), the problem was finally resolved and the fixture installed.
Ahhhh, light in the kitchen at long last. The chandelier is not too fancy, but adds some class to the room. The beaded flowers sparkle and I know I'm going to be cleaning out cobwebs, but its worth it. After all the time and hassle, it would have been easier to buy a new one. However, I know for sure I have the only chandelier like this!
Aug 23, 2013
A Chandelier for the Kitchen
Aug 9, 2013
Spring Arrived, and Passed By at Ghost Dog
FYI: This post was written back in March, but not published til now. Sorry for the delay.
So far, this has been a quiet spring. Winter was dry, little snow at the house and not much up in the mountains. Everyone in town has an underlying tension about the possibility of flood, but the plants and animals continue on as always. The sycamores and cottonwoods are greening up, the fruit trees are blooming (the first time all have bloomed). The weeds are sprouting and the lizards are out basking. I caught the first grasshopper of the year - a very nice specimen. My skills at keying out insects are rather poor, but I think this is a Red Shanked Grasshopper (Xanthippus corallipes). According to my grasshopper books, these guys winter over as immature adults and are common in the spring.
This hopper was not happy with my attempts to open its wings and pose its legs at the same time. It is difficult to tell from the photo, but this fellow is very colorful. The hind legs are a nice bright orange (easily seen), but the top of its abdomen and head are a rich marine blue (not so easily seen). I know not many people like grasshoppers, but they are wonderful.
So far, this has been a quiet spring. Winter was dry, little snow at the house and not much up in the mountains. Everyone in town has an underlying tension about the possibility of flood, but the plants and animals continue on as always. The sycamores and cottonwoods are greening up, the fruit trees are blooming (the first time all have bloomed). The weeds are sprouting and the lizards are out basking. I caught the first grasshopper of the year - a very nice specimen. My skills at keying out insects are rather poor, but I think this is a Red Shanked Grasshopper (Xanthippus corallipes). According to my grasshopper books, these guys winter over as immature adults and are common in the spring.
This hopper was not happy with my attempts to open its wings and pose its legs at the same time. It is difficult to tell from the photo, but this fellow is very colorful. The hind legs are a nice bright orange (easily seen), but the top of its abdomen and head are a rich marine blue (not so easily seen). I know not many people like grasshoppers, but they are wonderful.
Jul 27, 2013
Images from Monstercam
Last year I installed a motion detecting camera outside the cabin. The goal was to determine how much time the deer were spending in the orchard. The short answer turned out to be - A lot! I also figured out they were pretty much living under one of the trees in the yard. I know that the back fence had to go up (and it has since then), but I had no idea the ruminants spent so much time in my yard.
When I installed the camera, I was hoping for images of cougars, javalina and maybe a coyote or coati. Instead, the camera took hundreds of pictures of deer. And one cow. By the front door. I did get some fleeting night photos of the local javalina. Cute little guys, although they did eat all my pumpkins two years ago. Grrrrr.
Apr 19, 2013
Making a Kitchen Cart
The cabin is small (if you've been following the blog, you know this), and counter space is at a premium. I have a rolling cart with a butcher block top in IL and use it constantly. One day, the idea to make a similar cart with a marble top popped into my head. The result is shown at left - pretty simple, but very useful.
The toughest part was painting all parts of the shutters. Note to all, spray paint is the way to go! I sprayed the primer, but brushed on the final coats of blue. It was time consuming and looks sloppy, but the shutters are down at knee level, so I'm fine with the result.
Apr 5, 2013
In through the out door, Part 2
![]() |
| the old finish |
![]() |
| red on both sides of the room |
Mar 22, 2013
garden hightlights 2012
We're moving into spring and I'm always hopeful for the new year. Last year (2012) was difficult because of the massive fire (see previous post) and the following dry summer. We had problems with the old well (as usual) with the new issue of ash and fine sediments plugging the pump. As a result, the orchard was without water for most of the summer and fall. In spite of this, the remaining trees did remarkably well. Some of them are absolutely thriving. And then, there are the happy surprises.
I've included a slide-show of some of the highlights of the 2012:
The young apple and pear trees were full of blossoms a year ago. Sadly, no bees around the week of bloom. A few apples bloomed in 2011 and 2012 was the second year for the pears. The pear trees are still tiny (less than 4') but for their size, they pop with blooms. Last year we had our first apples. Tiny, but sweet and with an apple times ten flavor. Most of the apples are for cider, but these were eating apples and that's just what I did!
One of the happy surprises was an antique rose of unknown vintage growing gangbusters without any water all year. The original cutting is from the ditchbank at my Mom's house in Los Lunas. This is one of those floppy, hot pink roses and the original plants are about 100 years old. They have a lovely strong rose scent and bloom only once in the spring - Mother's Day week without fail. This plant represents my only successfully rooted rose cutting. The little fellow is planted on the north side of the orchard wall, and having less solar radiation and water loss is probably the key to survival. I'm very happy that this plant has accepted it's new home.
Along the lines of trees, I've planted various herbs, native wildlflowers and grasses. My favorite flowers are the red and blue salvias. The plants were from Plants of the Southwest in Albuquerque and did remarkably well considering they didn't have water during the hottest part of the year. By accident, I managed to do all the things to plants a desert gardener is not supposed to do! In spite of this, the salvias keep blooming - I'll be buying more because they are fantastic with the herbs and eyelash grass.
My last image shows the lavender 'hedge' about 3 years in. Considering that these plants started as 6" cuttings from IL, they look really good. I have two lines of lavender between lines of trees and once I get rid of the weeds, the orchard will look very nice. I'm considering planting another line of lavender, but because of the success of the salvias, I may put in a solid line of salvias instead (for the hummingbirds).
An upcoming post will outline the plans for the garden this year. Stay tuned...
I've included a slide-show of some of the highlights of the 2012:
The young apple and pear trees were full of blossoms a year ago. Sadly, no bees around the week of bloom. A few apples bloomed in 2011 and 2012 was the second year for the pears. The pear trees are still tiny (less than 4') but for their size, they pop with blooms. Last year we had our first apples. Tiny, but sweet and with an apple times ten flavor. Most of the apples are for cider, but these were eating apples and that's just what I did!
One of the happy surprises was an antique rose of unknown vintage growing gangbusters without any water all year. The original cutting is from the ditchbank at my Mom's house in Los Lunas. This is one of those floppy, hot pink roses and the original plants are about 100 years old. They have a lovely strong rose scent and bloom only once in the spring - Mother's Day week without fail. This plant represents my only successfully rooted rose cutting. The little fellow is planted on the north side of the orchard wall, and having less solar radiation and water loss is probably the key to survival. I'm very happy that this plant has accepted it's new home.
Along the lines of trees, I've planted various herbs, native wildlflowers and grasses. My favorite flowers are the red and blue salvias. The plants were from Plants of the Southwest in Albuquerque and did remarkably well considering they didn't have water during the hottest part of the year. By accident, I managed to do all the things to plants a desert gardener is not supposed to do! In spite of this, the salvias keep blooming - I'll be buying more because they are fantastic with the herbs and eyelash grass.
My last image shows the lavender 'hedge' about 3 years in. Considering that these plants started as 6" cuttings from IL, they look really good. I have two lines of lavender between lines of trees and once I get rid of the weeds, the orchard will look very nice. I'm considering planting another line of lavender, but because of the success of the salvias, I may put in a solid line of salvias instead (for the hummingbirds).
An upcoming post will outline the plans for the garden this year. Stay tuned...
Mar 15, 2013
Changes are afoot!
Dear Readers,
Recently, Google decided to drop two of its services, Reader and iGoogle. The reason boiled down to declining use (and the decision to focus on fewer, high-demand products). I am one of those busy people who relied on Reader to sort my feeds and save hundreds of tagged posts. The options do not work as well as Reader and much of my content will not migrate to another service. I will no longer subscribe to many great blogs (sorry bloggers). Google seems to not care about its devoted and passionate followers, of which I was one until a few days ago. The company doesn't seem to realize the impact this move will have on bloggers everywhere. Or maybe they do and just want to push everyone to use Google+ no matter what. Not everyone wants to get their updates via Facebook or Google+.
I have three blogs (including this one) on Blogger, another Google product. I have loved Blogger and I still think it is amazing that the designers were able to so easily and simply make web design available to everyone. My concern is that, eventually, Google will yank Blogger as well. There seems to be a pattern, provide a cool (and yes, free) service, get people hooked, then yank it or let it decline into crap. As Google has become a larger company, I've watched their customer service decline. I am concerned, not just as a web user, but as a creator of content.
I suspect that this pattern will only continue. Up until now, I've been happy to allow Google to trawl through my content and do whatever they do with it in return for a fantastic free service. Well, no longer. I am going to begin the process of migrating all of my stuff over to a new website.
For those of you who know me, you know I hate change. You know I don't work quickly. You know my personal motto (do the minimum). You can imagine... I...am...not...pleased. This strategy will mean a lot more work for me (damn it), but I will have control over my work.
The process will take time. I will continue to post and when I finally get the move done, most of my content will stay here for a while. For those of you who subscribe, I don't know what your options will be. RSS may be a thing of the past.
Thanks for visiting, following and reading. I hope to have a great new website in the future. Stay tuned...
Recently, Google decided to drop two of its services, Reader and iGoogle. The reason boiled down to declining use (and the decision to focus on fewer, high-demand products). I am one of those busy people who relied on Reader to sort my feeds and save hundreds of tagged posts. The options do not work as well as Reader and much of my content will not migrate to another service. I will no longer subscribe to many great blogs (sorry bloggers). Google seems to not care about its devoted and passionate followers, of which I was one until a few days ago. The company doesn't seem to realize the impact this move will have on bloggers everywhere. Or maybe they do and just want to push everyone to use Google+ no matter what. Not everyone wants to get their updates via Facebook or Google+.
I have three blogs (including this one) on Blogger, another Google product. I have loved Blogger and I still think it is amazing that the designers were able to so easily and simply make web design available to everyone. My concern is that, eventually, Google will yank Blogger as well. There seems to be a pattern, provide a cool (and yes, free) service, get people hooked, then yank it or let it decline into crap. As Google has become a larger company, I've watched their customer service decline. I am concerned, not just as a web user, but as a creator of content.
I suspect that this pattern will only continue. Up until now, I've been happy to allow Google to trawl through my content and do whatever they do with it in return for a fantastic free service. Well, no longer. I am going to begin the process of migrating all of my stuff over to a new website.
For those of you who know me, you know I hate change. You know I don't work quickly. You know my personal motto (do the minimum). You can imagine... I...am...not...pleased. This strategy will mean a lot more work for me (damn it), but I will have control over my work.
The process will take time. I will continue to post and when I finally get the move done, most of my content will stay here for a while. For those of you who subscribe, I don't know what your options will be. RSS may be a thing of the past.
Thanks for visiting, following and reading. I hope to have a great new website in the future. Stay tuned...
Mar 8, 2013
Wine Bottles to Windows Part 2
![]() |
| window in progress |
The goal for this project was to cover the 14" square
window in the living room and work on the tiny upper windows of the
kitchen. I've shown my process in a previous post; nothing too different here.
![]() |
| waiting to be installed |
I know, I know, the end results shown here are a bit messy,
but I'm happy with the result. I'm
especially pleased with the green windows.
They will be installed near the
ceiling and provide a bit of subtle light.
The main components of these windows are wine bottles (see the previous post on cutting). I wanted clear glass in the living room and
so had to drink a lot of not-so-great wine in clear bottles to get the glass I
wanted. One hint for beginners to
stained glass - don't start working with lots of circles. Fitting pieces to fill the spots between
rounds is a hassle (I hate cutting glass), and I usually end up using a huge amount of solder to fit the gaps. Be warned, this is not good technique.
One more window to go!
Stay tuned...
Jan 25, 2013
Plastering at the Cabin, Part 2
Contrary to popular belief, it takes a long time for natural adobe homes to return to the earth from which they were made. The roof (with 2' overhang) has protected these unplastered walls for over 30 years with no discernable 'melting.' As time goes by and the interior is basically done, I realize I have to finish the exterior. So the plastering has begun.
The process is pretty straightforward. Obtain screened soil with the appropriate clay/sand ratio, add a binder (I'm using horse manure - I have a ready source), add water and mix. It's a good idea to wait a few hours to let the mud fully hydrate. Remove dust from the wall, hose it down to help adherance, and then apply mud. Adobe mud is great stuff . You can keep working it forever on the wall. You can keep your mud till the next day. If you have too much mud you can let it dry and put it back in the garden, or the yard, or maybe make some adobes with it.
As for the technique, everyone develops their own. I do not plaster with a trowel because I have a difficult time maneuvering the tool with mud on it. I use my hands to apply the mud, and because I don't have calluses, I use thin leather gloves to maintain my feel for the wall and keep my skin from being ground off by abrasion. Plastering is fun and the end result looks great (as you can see in the photo below).
![]() |
| Plastered on the left, unplastered on the right. |
According to my father, a traditional mud plaster without stabilizer will last 40-50 years. After that, the walls have to be replastered. He seemed to think this was a negative, but compared to normal house maintenance, it's not bad. And I think mud just looks great, as you can see here, the result is warm and natural.
Stay tuned for more plastering in the spring..
Jan 18, 2013
Plastering At the Cabin, Part 1
As I mentioned in the previous post, I've been plastering at
the cabin. The building is made of basic
adobe (dirt + water + sun); no additives.
These days, many people use stabilized adobes to increase
waterprooficity, but when my dad was building the cabin, he went with the
traditional recipe. (Stabilizing adobe
most commonly requires the addition of petroleum additives. Another option is the addition of lime.) The
benefit to natural adobe is that anyone who has ever made a mudpie has the
basic experience and feel of the material.
![]() |
| The back of the cabin - all adobes visible. |
Looking at the still unplastered walls of the cabin is like
a reverse stratigraphic investigation.
My father made many of the adobes himself, trucking in soils from
various areas nearby. As the bricks were
made, he build the walls, so a close look reveals a variety of textures and
colors. Some bricks were made by now
defunct adobe yards throughout NM. When
I was very little, he brought in some burnt adobes (fired in kilns until the
clay has turned to ceramic) from the Tucson area, a type of brick not seen in
NM. Some bricks have larger pebbles,
others have a lot of sticks and bits of wood in them (which makes me wonder because
my dad hates that). The mud used as
mortar came from yet another soil source, so the walls are interesting to say
the least.
They walls are, of course, quite thick - at least 12", more
in some places. In the early days, my
dad was sloppy about the mortaring, so there are many large crevices that serve
as homes to a diversity of insects and small mammals (how I feel about this
depends on how often the fauna pass through the veil into the interior of the
home). The whole building is very NM, not at all like the nueva Santa Fe Style
featuring smoothed edges, massive walls and weird pink and turquoise accents.
Jan 12, 2013
The Tragic Cost of Mud Plaster In December
![]() |
| "Where oh where is my tail?" |
Anyway, I was mixing mud a few weeks ago, at the beginning
of December, an interesting time for most NM reptiles. Nights are regularly freezing or below, but
days are warm -into the 70's. Most herps
decide to find a cold, safe spot and hunker down for the next few months, but a few are still out. They are taking advantage of those last good basking hours and hunting the diversity of insects following the same strategy.
I was also taking advantage of the bask worthy temperatures
and so, there I was, digging into my pile of dirt, tossing it against a screen to get rid of rock and gravel. Every
so often, something would bounce off the screen rather than smack and slide
down. The bouncers were lizards - I
have never seen so many in one place at one time. After unearthing five and injuring two (so
sorry!), I decided I would have to stop - no more plastering in December!
Over my short lifetime, I've investigated many piles of
rocks and found many lizards (and snakes).
I've never found lizards fully surrounded by dirt. In the end, it's not unusual. This was soft dirt, very diggable, and probably
enticing as a quiet spot with stable temperatures. Because of the fire this past spring and the
giant cobble/boulder dike only 100 yards away, I would have guessed that a lot
of the local reptiles would seek winter hibernacula there.
Although I didn't do much plastering, and now have to do
extra good deeds to make up for the lost tails, the big plus was finding three
different kinds of lizards without much work: a juvenile Madrean alligator
lizard (Elgaria kingii), Cnemidophorus
flagellicaudus and C. uniparens.
I took photos of everyone and will post some info about these guys in a few
weeks.
Stay tuned for this year's herpetological version of meet
the locals...
Dec 24, 2012
Merry Christmas and Happy Artwork to All!
Happy Holidays! This lovely mosaic is made of bottlecaps (amazing I know!) and I created it using the steps outlined in a previous post. If you take a step back, you can see how wonderful the mosaic really is.
The mosaic is a gift to my brother in law who has a thing for Our Lady of Guadalupe. I tried a number of images, including the classic with the Virgin floating on a cloud surrounded by roses, but this version was so pretty it quickly became my favorite.
Some of you may be horrified of the idea of The Virgin Mary made out of bottlecaps, many of them beer caps, but to me this artwork is spot-on perfect. The idea that beauty can come from unexpected, and sometimes mundane, places is very appealing to me. And then there is something perfectly New Mexico about artwork like this - spirituality from simplicity.
The mosaic is a gift to my brother in law who has a thing for Our Lady of Guadalupe. I tried a number of images, including the classic with the Virgin floating on a cloud surrounded by roses, but this version was so pretty it quickly became my favorite.
Some of you may be horrified of the idea of The Virgin Mary made out of bottlecaps, many of them beer caps, but to me this artwork is spot-on perfect. The idea that beauty can come from unexpected, and sometimes mundane, places is very appealing to me. And then there is something perfectly New Mexico about artwork like this - spirituality from simplicity.
Dec 9, 2012
Creating the Bottlecap Mosaic, Part 2
In the last post, I described the process for creating the mural image. In this post, I'll show how th individual tiles were made. All 24,000 caps were sorted into milk jugs and various sizes of plastic bags. The point here is that all the caps had to be separated so I could find the appropriate cap for each spot in the mural. When I was ready to create the tiles, I was surrounded by all my jugs and bags arranged by color. Although this photo of my workspace on the porch doesn't look too messy, it also doesn't show the piles of stuff under the three tables.
The mosaic had been output as images of smaller tiles, each numbered by row and section. I followed the image printed on the output sheet, selecting and arranging caps row by row. Once a tile was complete, the caps were moved to my magnetic display board (covered with plastic wrap). The magnets kept the caps aligned and in the correct orientation during the next steps. In retrospect, and FYI if you want to try this yourself, making the board was an incredibly useful move. The project could not have been done without it.
The caps were cleaned with window cleaner (to remove dust, storage grunge & rust), then polished with rubbing alcohol (to dry them and remove any oils). After a few minutes, the tiles were sprayed with a UV protective acrylic sealer. Even though the samples at the cabin show no signs of fading after one year (see previous post), I wanted to make sure the colors last as long as possible. The cabin is in a very dry climate, but protection against rust seemed like a good idea. Just in case.
After 24 hours of drying time, a piece of tulle (for ballerina tutus) was placed over the caps. Four dots of glue (equal mix of Elmers and Eileens Tacky Glue) were dropped onto each cap through the tulle. Because I sealed the caps, regular glue wasn't adhesive enough to hold the caps in place. As I've mentioned in previous mosaic posts, the glue/tulle combo keeps everything in together during shipping and installation, but allows for easy removal of the tulle at the end of the project.
Once dry, each tile was labeled (tile#, top, bottom, right and left) completely. The entire mosaic fit into one large box and it was shipped to NM. Next step installation! Stay tuned...Nov 9, 2012
Creating the Bottlecap Mosaic, Part 1

You may have been wondering about the status of the mysterious bottlecap mural. I know! I haven’t said much about it in a while. After many months, nay years, progress has been made! Earlier this spring I had collected about 30K caps, enough to have all the colors I needed. I spent a lot of time sorting & cataloging the caps, then selected a design.
I decided to utilize an oriental carpet design because I didn’t want anything that looked too ethnic or strongly geometric. I scanned this image from a book, cropped it a bit, duplicated it and created a final mosaic design that would be about 6 ‘ tall and about 14’ wide.
The next step was using the freeware software package Andrea Mosaic. The software was designed to do photomosaics (perhaps you recall their popularity ~10 years ago) and requires a target image and a database of photos from which to recreate the image.
I photographed each unique cap on a grey background (to simulate adobe), then edited all the images to a square format. Andrea Mosaic allows you to set how many times an image can be repeated, whether or not the same image can be adjacent, if rotation is acceptable and the graininess of the final mosaic.

I spent about an hour tweaking settings to give me a mosaic with a good balance of detail and color blending. The software will break your output into pieces so you can work with smaller sizes (very helpful for large mosaics), so I printed out pages that would correspond to tiles about 10x14 inches.
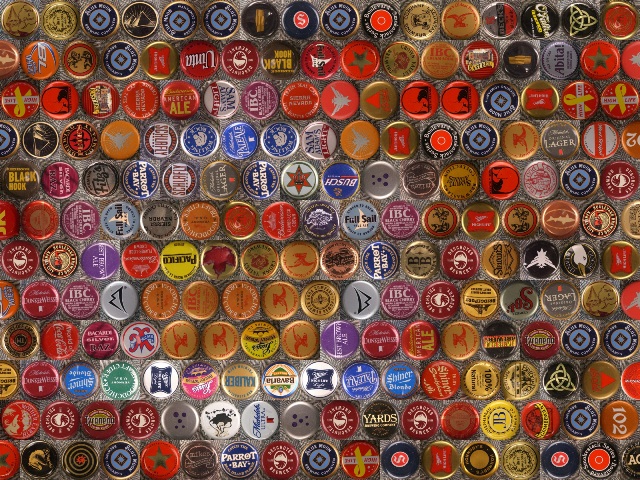
The tile shown here is typical output and if you look closely you may be able to recognize some of the brands of beer, cider or soda. The next step was creating the tiles. That was a lot of work and I'll describe the process in the next post
Stay tuned!
Oct 19, 2012
From Wine Bottles to Bathroom Windows

My father put tiny windows at the top of all north-facing walls in the cabin (the bathroom is shown here). I won't go into the explanation of why he did this (theoretically it makes sense), but these little openings have been a hassle for years. Because the walls are adobe, the sill is about 1 foot deep. Not only does a window have to be placed on the inside, but also the outside of the wall.
For years, I've put off the dealing with the windows because 1) I didn't know what to do with them, 2) tiny custom windows are expensive and, 3) I was hoping I could figure out a way to open the widows. After years of stuffing the openings with insulation and layers of hardware cloth, I've had it. Rodents love these windows and use them as doorways, but the main problem is spiders and insects. I love the little guys, but I don't like the resulting cobwebs/beetle leg/dust bomb combos that result
I love the look of tudor style windows with rondels of glass. Along those lines, I've seen some amazing stained glass done with bottle bottoms and glass plates and I thought I could do something similar. Rondels are expensive, but bottles are free and readily available. Shown at left are some wine bottles that Paul ad I cut (see previous post) for this project. I was concerned about the thickness of the glass, but what the heck, give it a try and see what happens.
By the way, I am not an expert at stained glass. I've dabbled in it, but I am very much an amateur. If you want to try something like this, start simple, have all the appropriate safety equipment and don't expect perfection in the beginning.
In this window, I wanted to combine glass nuggets (from any craft store) with the green glass. The first step was covering all the glass edges with copper foil tape, then arranging the glass pieces on a board, pinning them in place, and last, soldering. Shown at left is the arrangement of glass pieces on the board. As usual with my projects, I deviated from normal procedures: here, I was not creating a perfectly flat window to be inserted into a frame. I won't describe the installation process in detail, but my main concern throughout was maintaining the correct dimensions of the window opening.
At left, I'm holding the window after all the pieces have been tacked together with solder (the silver bead-looking things) on the wrong (outdoor) side. Shown here is the front side which has not yet been soldered. There is still a lot of copper visible and all of that is covered with solder in the next steps. At this point, the window (about 12" square) is quite heavy just from glass alone.
Shown here is the front (indoor) of the window after soldering is complete. Okay, it looks pretty sloppy, but this doesn't concern me because the window is 8' up and no-one is going to be looking at it up close. Because I didn't cut glass to fit between the bottle bottoms, a lot of solder had to be used to fill the spaces. This is a heavy window! At this point in the process, many stained glass artists would treat the solder to darken it. The process uses some nasty chemicals, takes more some more time, and didn't think it would add much to the final appearance of the window.
The installation required two frames attached to the window opening itself. One about 3" inside the sill and another flush to the edge. The stained glass panel fit between the two with some rubber weatherstripping along the edges for an airtight seal. The window itself is set back 3/4" from the face of the wall.
The view shown here is with the bathroom light off and the sun shining in. The little yellow light at the bottom is a set of beer bottles stuck into the adobe wall when it was built (another artistic addition from my father) in the 70's. I like the way the glass from the two types of windows complement one another.
The next windows (two in the kitchen) will be made out of clear glass bottles.
The view shown here is with the bathroom light off and the sun shining in. The little yellow light at the bottom is a set of beer bottles stuck into the adobe wall when it was built (another artistic addition from my father) in the 70's. I like the way the glass from the two types of windows complement one another.
The next windows (two in the kitchen) will be made out of clear glass bottles.
Stay tuned!
Aug 17, 2012
in through the out door
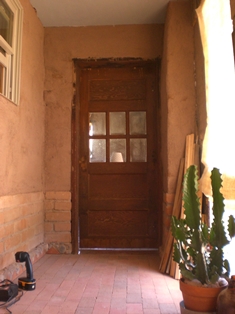
Between the sunroom and living room is a doorway. The door was removed years ago to finish plastering both rooms. This spring it was returned to it’s former place. What a job! This is an old-fashioned (at least 50 years old), exterior, wooden, security door. It is 2 inches thick with steel re-enforced windows - a chunk - and, as far as I can tell, nearly indestructible. It has lived outside for 2 years exposed to the elements with zero negative effects - a tough door.
As with so many other things in the cabin, there were issues. My dad found this door somewhere at some point in the 70's (he didn’t buy it) and built the doorway around it. But not in a normal way. The doorway is formed from boards of various dimensions. Each side is different. No stops for the door were installed. The old hinges were huge and extended out from the doorway. There was no doorknob, just a hasp screwed haphazardly onto a board and a combination lock hooked through it for closure.
Paul and I wrestled the door back into place. It did have to be cut down a bit to make room for the mosaic in the doorway (see previous post). Otherwise, it seemed to fit, but those hinges were still a problem. I had bought a variety of door hinges in the hopes that something would work better (i.e. normally), but because of the way the doorway was constructed, there was no way to use any of them. Back to the ginormous old ones. An additional problem was that the adobe+plaster behind the doorway would crumble (and fall away) whenever normal wood screws were used. The screws were quite hefty to hold such a massive door and were about 3" long. Poor Paul had to use a hacksaw to cut 15 screws shorter.
In the end, the door is pretty much the same as it was before. Sigh. Because the doorway isn't plumb, I don't want to hassle with attempting installation of doorknob hardware. I'll probably use a ball latch that will catch as the door swings. I plan to paint the sunroom side red (matching the lockers opposite) and the living room side a pale blue-grey. As it is now, the aged white side doesn't have an elegant shabby chic look, more like a dirty, battered one. Stay tuned for an update on the painting - perhaps occuring soon!
As with so many other things in the cabin, there were issues. My dad found this door somewhere at some point in the 70's (he didn’t buy it) and built the doorway around it. But not in a normal way. The doorway is formed from boards of various dimensions. Each side is different. No stops for the door were installed. The old hinges were huge and extended out from the doorway. There was no doorknob, just a hasp screwed haphazardly onto a board and a combination lock hooked through it for closure.
In the end, the door is pretty much the same as it was before. Sigh. Because the doorway isn't plumb, I don't want to hassle with attempting installation of doorknob hardware. I'll probably use a ball latch that will catch as the door swings. I plan to paint the sunroom side red (matching the lockers opposite) and the living room side a pale blue-grey. As it is now, the aged white side doesn't have an elegant shabby chic look, more like a dirty, battered one. Stay tuned for an update on the painting - perhaps occuring soon!
Aug 3, 2012
Sometimes a little grey is good
When facing the kitchen shelves with aged wood, I didn’t want to fuss with mitered joints. I didn’t think it was necessary. A small detail however, is that a lapped joint shows a bit of clean, non-aged wood right at eye level. What to do?
I remembered reading about aging wood using tea, vinegar, and rusty nails. Having all those items at hand in the cabin, I set to work. At the time I couldn’t remember the proper order of treatments, and I don’t know if it really matters. The basic concept (familiar to anyone who works with natural dyes) is mixing tannins with iron to create a black pigment. On wood, the color is grey and it really does match aged wood. The surface texture will differ, but for a tiny bit of wood, at an edge, this is a great technique.
In the photo above, you can see the effects of two applications on one half of an aged wood scrap; I used one application for my shelf. I also treated the top and bottom surfaces of the shelves (1/4" plywood). The surfaces are a smooth grey and match the color of the edge closely enough that the entire shelf seems like one very thick board.
I’ve found a recipe online similar to the one I recall from the past. If you try the technique, play around with the number of applications of each solution to get the intensity of grey you need. There is a strong vinegar smell while the wood is moist, but disappears when dried. The solutions are relatively safe, but even so, I wouldn’t leave them around kids or pets; they can be safely poured down the sink when you are finished.
I remembered reading about aging wood using tea, vinegar, and rusty nails. Having all those items at hand in the cabin, I set to work. At the time I couldn’t remember the proper order of treatments, and I don’t know if it really matters. The basic concept (familiar to anyone who works with natural dyes) is mixing tannins with iron to create a black pigment. On wood, the color is grey and it really does match aged wood. The surface texture will differ, but for a tiny bit of wood, at an edge, this is a great technique.
In the photo above, you can see the effects of two applications on one half of an aged wood scrap; I used one application for my shelf. I also treated the top and bottom surfaces of the shelves (1/4" plywood). The surfaces are a smooth grey and match the color of the edge closely enough that the entire shelf seems like one very thick board.
I’ve found a recipe online similar to the one I recall from the past. If you try the technique, play around with the number of applications of each solution to get the intensity of grey you need. There is a strong vinegar smell while the wood is moist, but disappears when dried. The solutions are relatively safe, but even so, I wouldn’t leave them around kids or pets; they can be safely poured down the sink when you are finished.
Jul 20, 2012
building an horno
Driving through northern NM, one sees hornos (bread ovens) pretty much everywhere. They are especially common in the Pueblos, but are found in the backyards of many older homes. An excellent way to bake breads (and meat) in the summer, the ‘modern’ hornos are based on Spanish/Moorish designs brought over back in the 1500's. Built from adobe, all they require is the right mix of soils, water, and an afternoon. Unlike modern adobe bricks which contain additives to make them water resistant, adobes for ovens must be totally additive free - this makes the project even more do-able for the beginner - and are simple to make at home.
Recently, my family got together to help my father build an horno. He has built with adobe for over 40 years and founded a school to help people build their own homes.
The base of this horno is dry stacked concrete blocks and adobes. The cooking surface is a single layer of redbrick. For this morning’s work (about 2 hours), four of us were able to mix mud, trim adobes and set 4 layers of bricks. The entire project could easily be finished in a day; add another day for a layer of mud plaster.
The first step is adding a layer of mud onto the bricks.
The interior diameter is sketched onto the bricks and the adobes added on top. Both sides should be level. The mud joints are smoothed with a spoon.
The doorway is made from redbricks set in mud. Each course starts with the door bricks and then follows around with adobe.
Bricks are cut to size by chopping off chunks. Precision is not important because spaces can be filled with mud.
Recently, my family got together to help my father build an horno. He has built with adobe for over 40 years and founded a school to help people build their own homes.
The base of this horno is dry stacked concrete blocks and adobes. The cooking surface is a single layer of redbrick. For this morning’s work (about 2 hours), four of us were able to mix mud, trim adobes and set 4 layers of bricks. The entire project could easily be finished in a day; add another day for a layer of mud plaster.
The interior diameter is sketched onto the bricks and the adobes added on top. Both sides should be level. The mud joints are smoothed with a spoon.
After the 2nd course, the bricks start to angle up on the exterior side. Mud is added as before, but now more is added on the exterior edge than the interior one.
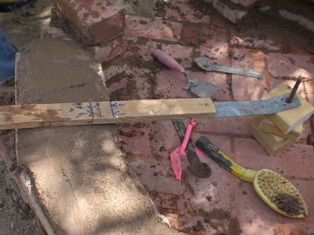
The process from now on creates a 2-d roman arch. The only technological assistant is a piece of rebar and flat stick with a line drawn to mark the interior diameter of the horno.
The adobes are placed on the mud, matching the interior edge with the line on the stick.
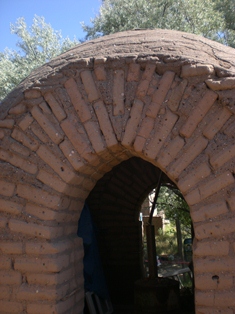
And so it goes, course by course. At the top the adobes will be nearly vertical and are held in place by friction with the mud. Believe me, it works. Once the last adobe is placed in, the ring locks into place and becomes very strong. This is the process by which elegant adobe buildings were built throughout the middle east (and in some places sill are).
This is the process by which elegant adobe buildings were built throughout the middle east (and in some places sill are). Shown here is a building in progress with a double roman arch doorway set into an adobe dome. As lovely as it is outside, it is quite impressive inside looking up.
Jul 6, 2012
Adventures in Shelving
Work in the kitchen is almost complete. One of the last steps is installation of shelving. Because the room is so small and relatively dark, I decided against upper cabinets and chose to have a single row of shelves across the wall. I have to wait until the on-demand water heater is installed to put in the long shelf, but recently, Paul was able to work on the shorter shelf.
The first step was creating the hollow shelf. A frame was made from scrap 1x2's, screwed and glued securely (you can see some finger wipes in the photo). A skin of 1/4" plywood was glued on the top and bottom. I wasn’t concerned about perfect alignment (although Paul was) of the various parts because I wanted to face the edges of the shelf with a strip of aged wood (see previous posts about the sunroom). The aged wood would visually create a thick board, match the vigas, other finishes in the cabin, and just add to that casual, ‘rusticity’ that you see in old adobe homes.


Most torsion shelves are sanded and painted before the final install. Visually the shelves appear to float and have a very modern look. We installed cast iron brackets before adding the aged wood to the sides. A side benefit of the torsion shelf is that we didn’t have to worry about the brackets not being screwed into a stud. We did use expansion bolts (just in case) and the result is a very sturdy shelf.
All walls in the cabin are solid adobe, but the south wall (along which the plumbing runs) has drywall covering the bricks. This was the simplest way to deal with covering pipes and had the added benefit of creating a plumb surface along which the lower cabinets could run and providing an easier material into which shelves could be installed.
I don’t like the look of thick supports under shelves, but thought that something would be needed for support. These shelves will hold all the dishes, so there is potential for a heavy load. I bought some lovely cast iron brackets (see my Pinterest page for a link), but was still concerned that more support would be needed. Better to go overboard, than have all my bowls crash down.
After consulting various online sources, Paul and I designed a variation of a torsion shelf based on two websites, one from popular mechanics and the second from a blog.
A cleat was screwed into the studs on the wall. As with the frame, the cleat was scrap wood. It fits inside the torsion shelf and doesn’t show, so it doesn’t have to be attractive. It does have to fit snugly, so Paul spent some time sanding to get the shelf well seated on the cleat.
The shelf is then slid onto the cleat and securely screwed onto it. This photo shows the prefitting, before the aged wood was added to the edges. Interestingly, the adobe wall to the left is so out of plumb that when the shelf was level, it looked decidedly unlevel. We had to fiddle with it a bit to make it look good to the eye. Ahhh, the joys of working in an adobe home.
Most torsion shelves are sanded and painted before the final install. Visually the shelves appear to float and have a very modern look. We installed cast iron brackets before adding the aged wood to the sides. A side benefit of the torsion shelf is that we didn’t have to worry about the brackets not being screwed into a stud. We did use expansion bolts (just in case) and the result is a very sturdy shelf.
Subscribe to:
Posts (Atom)